
I had recently ran out of Meringue Powder. The canister looked like something I might be able to use for something else at a later date. I had tried to use it to store cupcake liners, but it was just a bit too small for that. Then, I thought about storing pastry bags, but it was too short. I was beginning to think that I might not be able to use this canister after-all. Then the whole sprinkles ordeal came about. This canister would be perfect for that.
So, I got out my Washi Tape and got to work.

First, you'll need to paint the canister. I used basic craft paint, but you can use spray paint as well. The craft paint took me three coats. I probably could have gotten away with two, but I wanted to make sure none of the writing would show through.

Next, you'll need to measure the canister. You will need to know how many strips of Washi Tape that you will need, and then you will need to measure how long the Washi Tape needs to be. This is simple. Just attach the tape to the canister, then peel it off. With my canister, I needed about 8 inches of Washi Tape. To print on the Washi Tape, follow these steps:
- Print your label onto a sheet of paper. I used size 48 Lucida Handwriting font.
- Attach your Washi Tape to the paper, over the font.
- Place the paper back into the printer, and print again.
Make sure you let the printed Washi Tape dry for at least 20 minutes. It may take longer.
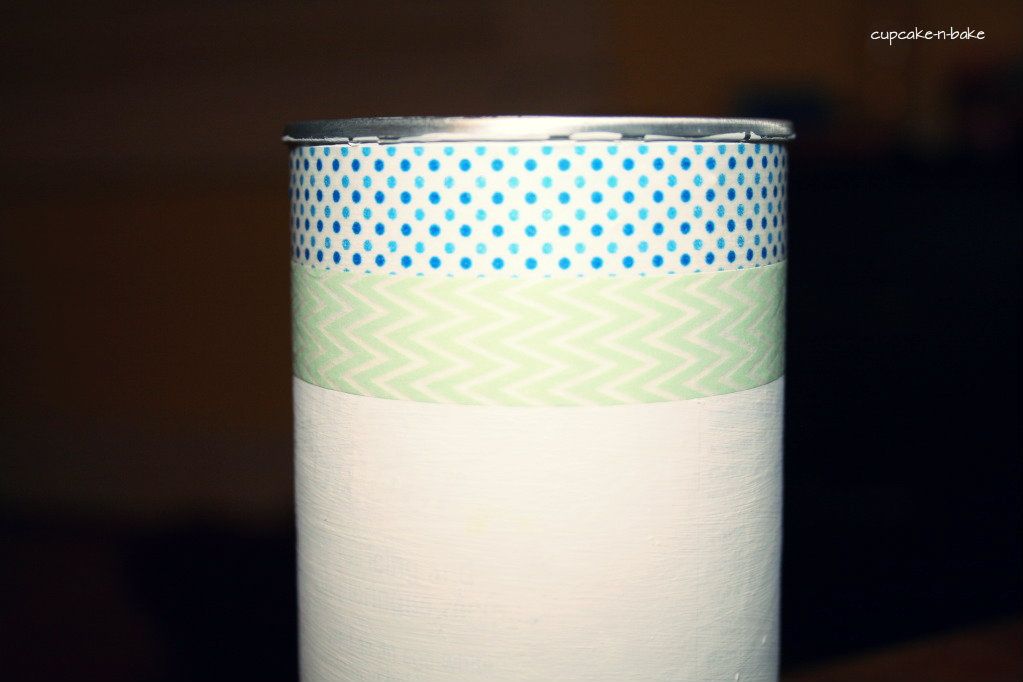
While you are letting the printed Washi Tape dry, begin attaching the other Washi pieces to your canister. Try to maintain a designated seam, meaning make sure the seams match up. Also, try to line your Washi pieces up close together, so they look seamless. When your printed pieces are dry, attach those as well.

Your finished product should look similar to the picture above. Now, you have a cute place to store your sprinkles. You can't even tell that it used to be a canister for Meringue Powder.


What a great idea and so cute!! I love Washi tape. Thank you so much for sharing at a Bouquet of Talent. I am thrilled to have you share your great project. :)
ReplyDeleteKathy, I'm on a Washi Tape Craze! Thanks so much!
DeleteGreat job. My kids sure don't mind mixed up colors in their sprinkles! Thanks so much for linking up at One Creative Weekend! Enjoy your week.
ReplyDeleteThanks for visiting! Yeah, kids usually don't mind sprinkles, even if they are all different colors.
DeleteI love Washi tapes!:D You can make all sorts of stuff with them.
ReplyDeleteThanks for sharing it on my site. I hope you got the button. :)